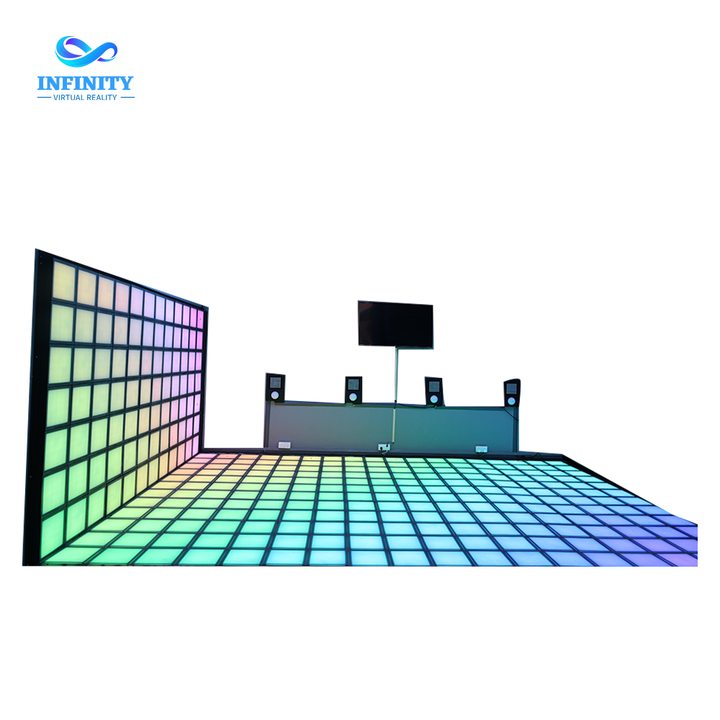
The interactive floor install starts before the tiles arrive: the site preparation decides whether the grid sits flat, the cables reach and the floor survives the first year. The Infinity Grid LED Dance Floor grid carries the tile-to-tile connection and the power and data feed, so the room has to be measured, the subfloor inspected and the service points positioned before the first tile is placed.
The preparation has five parts. First, the measurement: the room is measured and the grid layout is drawn with the tile count and the cut tiles marked, because the interactive grid is a modular product and the layout is the difference between a clean grid and a patchwork. Second, the subfloor inspection: the concrete or the existing floor is checked for the cracks, the moisture and the level, because the tile grid transfers every subfloor defect to the surface. Third, the service points: the power outlet and the data point are positioned at the control corner of the grid, within the cable reach of the control unit.
| Site Prep | Item | Standard |
|---|---|---|
| Measurement | Full room measured, layout drawn | Tile count + cuts planned |
| Subfloor | Checked for cracks and moisture | Defects fixed before install |
| Service points | Power + data at control corner | Within control cable reach |
| Clearance | Perimeter gap marked | Expansion and access |
| Schedule | Install window + curing time | No foot traffic during install |
The levelling is the heart of the install, because the interactive tile senses the player through the surface and the tile-to-tile connection demands the flat plane. The standard is plus or minus 3 millimeters across the whole grid area, measured with the long straightedge: the subfloor that deviates more than the tolerance is corrected with the self-levelling compound before the tiles go down, never after.
The 3-millimeter tolerance protects three things. First, the tile connection: the tile-to-tile connectors seat only on the flat plane, and the raised tile edge is the connector that fails and the trip hazard that the player hits. Second, the sensor accuracy: the LED and the pressure-sensing tiles read the player position, and the tilted tile shifts the reading and the game calibration drifts. Third, the surface wear: the uneven grid flexes under the players and the flex is the crack that starts at the seam.
| Levelling Standard | Check | Specification |
|---|---|---|
| Flatness | +/-3 mm across the grid area | Long straightedge test |
| Compound | Self-levelling where needed | Full curing before install |
| Seams | Tile edges flush, no lip | No raised or sunken tile |
| Moisture | Subfloor dry, no damp | Moisture test before compound |
| Recheck | Level rechecked after curing | Final flatness sign-off |
The cable routing is the layer that keeps the grid clean and the venue safe: the interactive floor feeds every tile with power and data, and the feeds have to run hidden, protected and serviceable. The standard is the channel routing: the floor channels or the under-tile channels carry the cables to the control corner, the channels run at 2-meter spacing under the grid and the cables never cross the play surface on top of the tiles.
The routing has three rules. Rule one is the separation: the power cables and the data cables run in the separate channels or the shielded separation, because the power line noise corrupts the tile data and the corrupted data is the game that freezes mid-play. Rule two is the protection: the cables run in the conduit or the channel, never loose under the tiles, because the loose cable is the pinch point and the future fault that costs the tile access. Rule three is the serviceability: every channel end and the control corner keep the access point, because the cable fault is found and fixed in minutes when the route is labeled and accessible.
| Cable Rules | Rule | Why |
|---|---|---|
| Channel routing | Cables under tiles, never on top | Clean surface, no trip |
| Power/data separation | Separate shielded channels | No signal noise |
| Conduit protection | Cables in conduit or channel | No pinch, no future fault |
| Access points | Labeled, reachable channel ends | Fast fault repair |
| Control corner | Single feed point | One place to power down |
The assembly is the fastest part of the install when the prep is right: the tiles click into the grid in the planned sequence, the connectors seat and the alignment locks. The sequence runs from the control corner outward: the first tile lands at the corner, the rows build in the arrows, and each tile clicks into the previous tile and the row edge, so the grid builds in the single direction and the alignment never drifts.
The assembly details decide the finish. The alignment: each tile seats flush with the neighbors and the seam gap stays uniform, because the uneven seam is the surface defect the player feels and the camera sees. The connectors: every connector clicks fully, and the half-seated connector is the tile that flickers on day one and fails on day ninety. The edge tiles: the cuts land at the perimeter, the cut tiles are trimmed to the drawn layout and the perimeter gap carries the expansion allowance and the trim cover.
| Assembly Sequence | Step | Detail |
|---|---|---|
| Corner start | First tile at control corner | Anchor of the whole grid |
| Row build | Rows in arrow direction | Alignment holds as it builds |
| Connector seat | Every click verified | No half-seated connectors |
| Edge cuts | Trimmed to layout, perimeter gap | Expansion + trim cover |
| Full grid | All tiles placed and seated | Ready for the test phase |
The assembly of a 100-square-meter grid runs about 30 minutes per section with the two-person crew, and the full day covers the placement, the edge trim and the first visual check. The crew checks each section as it finishes, before the next section covers the access, and the check-as-you-go rule catches the connector fault while the tile is still reachable.
The commissioning is the gate between the install and the opening: the grid is tested, calibrated and played before the first paying guest. The test sequence has four stages. Stage one is the power test: the control unit powers the grid, every tile lights and the dark tile is the connection fault marked for the re-seat. Stage two is the calibration: the LED colors align, the sensor grid maps the floor and the game calibration runs the position check, because the game reads the player through the calibrated map.
Stage three is the pressure and the play test: the crew walks every tile, jumps the seams and plays the actual games, and the dead tile, the flicker and the missed step are logged and fixed before the opening. Stage four is the documentation: the test record lists the tiles tested, the calibration result and the re-test after any repair, and the record is the handover document the operator keeps for the maintenance schedule.
| Commissioning | Test | Pass Criteria |
|---|---|---|
| Power test | Every tile lights | No dark tiles |
| Calibration | Colors and sensor map aligned | Game reads the floor |
| Pressure test | Every tile walked and jumped | No dead or flickering tile |
| Play test | Actual games played | Full game functionality |
| Documentation | Test record + calibration saved | Handover file complete |
The commissioning ends with the 100 percent test coverage: the venue does not open the grid until every tile has been walked and the full game library has been played, because the tile that fails on the opening weekend costs the guest experience and the staff hour. The test phase is the last chance to catch the fault with the crew on site, and the venue that skips it trades one day of testing for weeks of fault chasing.
Plan for 3 to 5 days total: one day for the site prep and the levelling compound, one day for the cure and the recheck, one to two days for the tile assembly and one day for the commissioning tests. The unprepared site stretches it to weeks.
Plus or minus 3 millimeters across the whole grid area, measured with the long straightedge after the compound cures. The tolerance protects the tile connectors, the sensor accuracy and the surface wear.
Yes, the power and data cables run in the floor channels under the tiles at about 2-meter spacing, with the power and data separated and the access points labeled. The cables never cross the play surface on top of the tiles.
The grid installs on the concrete or the stable existing floor after the moisture test, the crack repair and the self-levelling. Carpet and unstable subfloors need the removal or the stabilization before the tiles go down.
The commissioning runs four stages: the power test where every tile lights, the calibration of the colors and the sensor map, the pressure and play test where the crew walks and plays every tile, and the documentation of the test record.
The two-person crew with the manufacturer drawings handles the assembly, and the electrical connection should be done by the qualified electrician. The manufacturer or the dealer can supply the supervised install for the first project.
The interactive floor tile grid install is the part of the project that decides the first year: the site prep, the levelling tolerance, the hidden cable routing, the assembly sequence and the commissioning tests stack into the floor that plays perfectly from day one and the floor that chases faults for months. The standards are not paperwork; they are the install that stays flat, connected and serviceable.
The Infinity Grid LED Dance Floor is the tile grid at the center, the Custom Interactive Sportainment Equipment shares the same floor prep and the Rubber Bullet Shooting Machine C4 follows the same protected feeds. The next step is the kit: ask NextPlay for the installation kit, the site preparation checklist, the levelling and cable routing drawings and the commissioning test plan for your venue.
Ask NextPlay for the installation kit: the site preparation checklist, the levelling and cable routing drawings and the commissioning test plan for the Infinity Grid LED Dance Floor, the Custom Interactive Sportainment Equipment and the Rubber Bullet Shooting Machine C4.